How to Grow Moringa from Cuttings
Moringa, also known as the “miracle tree,” has been praised for its incredible health benefits and nutritional value. It is an easy-to-grow plant that can be propagated through seeds or cuttings. Growing Moringa from cuttings is a popular method as it’s a quick and reliable way to get new plants. Not only is it an inexpensive method, but it also ensures that the new plants are genetically identical to the parent plant. In this article, we’ll guide you through the process of growing Moringa from cuttings step-by-step, from selecting the right cuttings to caring for the plants once they’ve been transplanted. So, let’s get started and learn how to propagate your very own Moringa plants!

Selecting the Right Cuttings:
Before you start propagating your Moringa plants, it’s important to select the right cuttings. This ensures that your new plants will be healthy and strong. Here are some things to keep in mind when selecting cuttings:
Choosing healthy branches for cuttings:
The branches you choose should be healthy and disease-free. Make sure to avoid branches that are damaged or wilted. Look for branches that are green, firm, and have at least 3-4 leaves. Choose branches that are about 1/2 inch to 1 inch thick as these tend to root better than thinner branches.
Ideal time for taking cuttings:
The best time to take cuttings is during the plant’s growing season, which is typically in the spring or summer. This is when the plant is actively growing and has the highest chance of successful rooting. It’s important to take the cuttings in the morning when the plant is well-hydrated. Avoid taking cuttings during hot, dry weather as the cuttings may dry out quickly.
Once you’ve selected the right cuttings, it’s time to prepare them for propagation. In the next section, we’ll guide you through the steps for preparing your cuttings.
Preparing the Cuttings:
Once you’ve selected healthy branches for your Moringa cuttings, it’s important to properly prepare them for propagation. Here are the steps to follow for preparing your cuttings:
Sanitizing the tools used for taking cuttings:
It’s important to use clean and sterilized tools when taking cuttings to prevent the spread of diseases. Sanitize your pruning shears or knife with rubbing alcohol or a bleach solution before using them.
Trimming the leaves and branches of cuttings:
To prepare your cuttings, remove any leaves or branches from the bottom 2 inches of the cutting. This will ensure that the cutting focuses its energy on rooting rather than supporting leaves. If the remaining leaves on the cutting are large, you may need to trim them to reduce moisture loss.
Applying rooting hormone to cuttings:
Rooting hormone can help your Moringa cuttings establish roots more quickly. Dip the end of the cutting into rooting hormone powder, making sure to cover the bottom 2 inches of the cutting. Shake off any excess powder and then gently tap the cutting to remove any loose particles.
With your cuttings now properly prepared, it’s time to plant them in soil. In the next section, we’ll guide you through the steps for planting and caring for your cuttings.

Planting the Cuttings:
After preparing your Moringa cuttings, it’s time to plant them. Here’s what you need to know about planting the cuttings:
Selecting a potting mix for the cuttings:
Choose a well-draining potting mix for your Moringa cuttings. A mix of peat moss, perlite, and vermiculite is ideal. Avoid using garden soil or heavy clay soils as they retain too much water and can suffocate the roots of your cuttings.
Proper way to plant the cuttings in the soil:
Make a small hole in the potting mix using a pencil or similar tool. Gently insert the cutting into the hole, making sure to cover the bottom 2 inches of the cutting. Lightly press the soil around the cutting to ensure good soil-to-cutting contact. Space your cuttings at least 2-3 inches apart to prevent overcrowding.
Adding water and placing the cuttings in a warm, humid location:
Water the potting mix lightly to moisten it. Avoid over-watering as this can cause the cutting to rot. Cover the pot with a plastic bag to create a humid environment for the cuttings. Place the pot in a warm, bright location, but avoid direct sunlight as it can dry out the soil too quickly.
With your Moringa cuttings now planted, it’s time to care for them properly. In the next section, we’ll guide you through the steps for caring for your cuttings.

Caring for the Cuttings
Once your Moringa cuttings are planted, it’s important to care for them properly. Here are some things to keep in mind when caring for your cuttings:
Monitoring the moisture level of the soil:
Check the soil moisture level regularly and water the cuttings as needed. The potting mix should be moist, but not waterlogged. Over-watering can cause the cuttings to rot, while under-watering can cause them to dry out and die.
Controlling the temperature and humidity of the environment:
Maintain a warm and humid environment for your cuttings. Keep the pot covered with a plastic bag or humidity dome to create a humid environment. Avoid exposing the cuttings to cold drafts or temperatures below 60°F (15°C). If the temperature is too low, use a heat mat to maintain a temperature between 70°F (21°C) and 85°F (29°C).
Providing enough sunlight for the cuttings:
Moringa cuttings need bright, indirect sunlight to grow. Place the pot in a bright location with some shade during the hottest part of the day. If you’re growing the cuttings indoors, place them near a bright window or under grow lights.
With proper care, your Moringa cuttings will start to grow roots and establish themselves in the soil. In the next section, we’ll guide you through the steps for transplanting your cuttings into larger containers or the ground.

Transplanting the Cuttings:
Once your Moringa cuttings have developed a strong root system and have outgrown their initial container, it’s time to transplant them. Here are some things to keep in mind when transplanting your cuttings:
Signs that the cuttings are ready for transplanting:
The cuttings are ready to be transplanted when they have developed a strong root system and have outgrown their initial container. You can check the roots by gently pulling the cutting out of the soil.
Preparing the soil for transplanting:
Choose a well-draining soil mix that is rich in organic matter. Mix compost or well-rotted manure into the soil to provide the cuttings with essential nutrients. Make sure the soil is moist before transplanting the cuttings.
Proper way to transplant the cuttings into a larger pot or the ground:
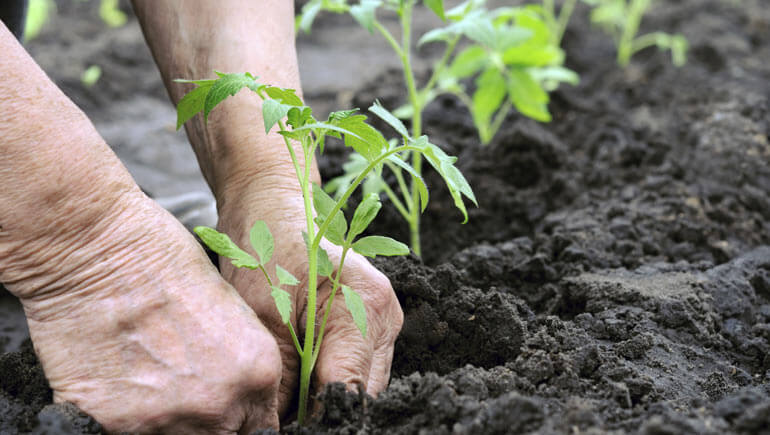
Gently remove the cutting from the initial container and loosen any tangled roots. Dig a hole in the center of the larger container or ground that is deep enough to accommodate the roots of the cutting. Place the cutting in the hole and fill in the soil around it, making sure the soil is firm and the cutting is stable. Water the soil thoroughly after transplanting.
When transplanting your cuttings, it’s important to avoid damaging the roots. Be gentle and take your time to ensure a successful transplant. With proper care, your Moringa cuttings will grow into healthy, mature plants that will provide you with an abundance of nutritious leaves, pods, and seeds.
Maintaining the Moringa Plants:
Once your Moringa cuttings have been successfully transplanted, they will grow into mature plants that require proper maintenance. Here are some things to keep in mind when maintaining your Moringa plants:
Regular watering and fertilizing:
Moringa plants require regular watering to ensure they stay healthy and hydrated. Water the plants deeply and regularly, especially during hot and dry weather. Additionally, fertilize the plants with a balanced fertilizer to provide essential nutrients. Apply the fertilizer every two to three months during the growing season.
Pruning and shaping the plants:
Pruning and shaping the Moringa plants is essential to encourage bushy growth and improve their overall appearance. Trim off any dead or damaged branches and remove any low-growing branches. Additionally, pinch off the growing tips of the plants to encourage branching.
Common pests and diseases and how to deal with them:
Moringa plants are generally resistant to pests and diseases, but some common issues can still arise. Aphids and spider mites can be controlled with insecticidal soap or neem oil. If the plants develop fungal diseases, such as powdery mildew, treat them with a fungicide. Additionally, keep an eye out for signs of root rot, which can occur if the soil is too moist.
With proper maintenance, your Moringa plants will grow into healthy and productive trees. Regularly watering and fertilizing, pruning and shaping the plants, and dealing with any pests or diseases that arise will help ensure that your Moringa plants thrive.

In Summary
Growing Moringa from cuttings is a great way to propagate new plants and ensure a bountiful harvest of nutritious leaves, pods, and seeds. Here are some key steps to keep in mind when growing Moringa from cuttings:
- Selecting healthy branches for cuttings and taking them at the right time
- Preparing the cuttings by sanitizing tools, trimming leaves and branches, and applying rooting hormone
- Planting the cuttings in a well-draining soil mix and providing a warm and humid environment
- Caring for the cuttings by monitoring moisture levels, temperature, humidity, and sunlight
- Transplanting the cuttings when they have outgrown their initial container and maintaining the mature plants by watering, fertilizing, pruning, shaping, and dealing with any pests or diseases that arise.
Growing Moringa from cuttings can be a rewarding experience for gardeners and farmers alike. By following the steps outlined in this article, you can ensure the success of your Moringa plants and enjoy their many health benefits. Whether you are growing Moringa for personal use or for sale, it is important to give them proper care and attention throughout their lifecycle. Good luck and happy growing!
References:
- “Propagation of Moringa oleifera using stem cuttings” – World Agroforestry Centre – https://www.worldagroforestry.org/treedb/AFTPDFS/Moringa_oleifera/moringa_oleifera_propagation_stem_cuttings.pdf
Moringa With Barry stores offer a variety of moringa products. These include: Moringa Powder, Moringa Tea, Moringa Capsules and Moringa Oil.
Read more:
Growing Moringa Indoors: Tips and Techniques
Winterizing Moringa: How to Protect Your Tree in Cold Seasons
Exploring Moringa: How Many Species Exist?
Moringa Seed Oil: Unveiling the Benefits of this Miracle Oil
Moringa Seed Pesto Pasta: A Delicious and Nutritious Recipe


